Wednesday, February 8, 2017

App-Master Challenge

What student doesn't love a good challenge? Sometimes we find that students struggle with some of the basic quick tools that can be extremely resourceful on the iPad. So, how do we solve that without strictly doing direct instruction?

Introducing....the App-Master Challenge!


My teaching partner and I have a goal to create student leaders, to encourage students to be the problem solvers and coach others to troubleshoot together. The fun part about this challenge, for every challenge completed, students will earn a badge. What I absolutely love about it, is that students can work at their own pace and challenge their creativity. We plan to cover commonly used apps such as: Pages, Keynote, Numbers, Docs, Slides and Sheets. Hoping students can make the decision on which app may be best for their project in mind.

The first challenge we decided to introduce to the students was in Pages. One of the quickest and very creative editing tools that is often looked over as a 4th and 5th grader is Instant Alpha, or removing the background from around a certain image. This leads into a lot of great discussion points about digital citizenship, copyrights and how they can utilize this tool outside of our lab.


I am only 3 days into this particular challenge and I am blown away by the creativity. The students have had so much fun using the green screen to transport themselves to a favorite destination or setting of their book. Once the challenge is introduced, the creativity is in their hands as they are encouraged to communicate and collaborate with others.

What would make my heart happy is seeing the students begin to coach others, including the teachers, to utilize these tools in their daily/weekly practice. We assume the students always know the ins and outs of their device, but this is one extra step in helping their creativity and leadership expand.


Friday, February 3, 2017

Breakout EDU

I remember first hearing about Breakout EDU last year and wondering what the heck it was. I kept hearing the new buzz word around and it wasn't until attending a local Students Involved with Technology conference that I got to experience this activity first hand with students. I was completely in awe and taken back by how fun and engaging this critical thinking experience was.

As my co-teacher and I began to investigate more, we figured this would be a perfect way to review Digital Citizenship, and we found a perfect culminating activity on the Breakout EDU site. The tricky part, not having a classroom budget, was to creatively collect the supplies needed so we could build our own. Keeping in mind, it had to be durable enough for nearly 500 students to be hands on with the pieces weekly.

Boxes - small toolboxes from the Dollar Tree
Pencil Pouch - zippered pouch that could easily be locked as well
Key locks - from the dollar tree
3 Digit Number Locks - from Aldi
Direction and Word Locks - from Home Depot
4 Digit directional lock - from Amazon
Black lights - from Amazon. I found that the different colored pen lights worked much better and were more durable compared to the individual black light.

One new addition that we added to our boxes were a suggestion found from the Breakout Facebook group. I saw a teacher who color coded her breakout box activities for the groups...this was genius! After contacting the teacher, we began ordering the colored plastic bins and the colored folders for clues. I highly recommended the lock parking lot after going through the experience of having locks accidentally reset.

Overall, I love Breakout EDU! Next to coding, it is a top favorite in our class!


*The activity shown in the picture is the "Caught in the Code" game from the Breakout EDU website.


Friday, December 9, 2016

Coding Collection 2016

It wouldn't be another year in the innovation lab without celebrating the annual Hour of Code. Similar to last year, my teaching partner and I decided to expand that one hour into 4-6 weeks worth of hands on coding activities. This is usually always one of the favorite projects in the lab, hands down.

Here is our menu of activities for this year:
1. Minute-to-Win-it = This idea was taken from the task cards found on the Spark Website HERE We slightly modified it to the students recording how long it took them to complete a challenge with a partner as opposed to trying to complete the challenges in one minute. Instead of using the Spark app, we had the students use Tickle.

2. Coding Collection - we provided a wide variety of apps for students to code and explore. Choices for this activity included: Swift Playground, Tynker, Code.org and Lightbot.

3. Wonderopolis - Students had to code Dash, using the Wonder app Blockly. In teams, students took turn catapulting the ping pong ball down the walkway. Students placed number markers on the floor to then measure and compare distances after each member went.

4. Unplugged - students decoded messages following algorithms of Down, Right, Left and Up.

5. Ollie's Obstacles - always a favorite of students! However to allow more students hands on time with coding, I had prebuilt accessories for the course that students were then able to assemble the way that they desired. They then had to code Ollie, using Tickle, to maneuver through their course.

6. Scratch - students use the Macbooks to explore the famous scratch.mit.edu website. They were able to free code or follow one of the provided tutorials from their online site.

During the coding process, students were to continuously reflect on their experiences using Numbers to document their data, challenges and interests.


Wednesday, November 30, 2016

3D Journey Around the World

We are going into our 3rd year of luckily having our 3D printer in the lab. As each year approaches, my teacher partner and I try to design lessons that will allow students to challenge their 3D design skills.

Our 3D design program of preference is Tinkercad. This makes login seamless with our district Google Accounts and it is useful that it is web based, allowing student to work off of any computer. My only wish, would be for this program to be functional on our student iPads. I really like the creative freedom that this website allows students to experience as opposed to apps that you can download.

We began our project by introducing students to what 3D printing is and for those that experienced a similar lesson last year, we used this as a reflection session. We also took the time to create expectations for this project using Padlet. The results from our student feedback created the rubric for our project.

We then challenged the students to recreate images from our 3D program boot camp. This gave 4th graders the opportunity to learn new skills and for 5th graders to review.

The overall theme for this project, was with the summer Olympics in mind. We had students brainstorm and select an internationally known landmark to use as their inspiration. From there, the designing and creativity was at their fingertips. Overall, I couldn't be happier with their progress and the hard work they are contributing to their final design.


Monday, January 11, 2016

Hour of Code

The Hour of Code is always an event that my students and I look forward to. This year, we were lucky to have some additional resources that allowed us to expand the coding experience past using websites like Code.Org and Tynker.

I'm very lucky to have a co-teacher that is excited to try new activities, like myself. We work very well when planning and smashing some of our ideas together to create a unique experience for our students.

As always, we began Hour of Code this year with the recent Code.org video. The kids always love looking into the world of code from the professional side, especially when it relates to the anticipated movie of Star Wars, the Force Awakens.

For this particular project, students were placed into groups of 4 or 5 depending on class size. I like to use our seating chart generator in Power School, just to really mix the members of the groups up after allowing them to pick their own groups for their previous project.

We then introduced our coding activity using a Numbers spreadsheet on the iPad. Until this year, I honestly didn't realize how convenient Numbers can be to create organized projects for students. In order to get the students a copy of the spreadsheet without having to airdrop to all individual students, we provided them a link/QR code in Edmodo that they could easily download and import into their own iPad.  We walked through each activity, reviewing directions for the stations and taking any questions that they had. We planned on using about 20 minutes per rotation.

Here are some of the stations we planned:
1. Computer Coding - we used code.org so students could create accounts and as teachers we could see their projects. Plus, many were interested in the new Minecraft and Star Wars modules.
2. Fun with Floors - I started using Pixel Press Floors, Floors in the App Store, a few years ago. It still continues to be a student favorite allowing them to code and create their own video game with a different type of code compared to block or script.
3. Ollie's Obstacles - students had to construct an obstacle course for Ollie and then try to maneuver him through.
4. BB8 Bowling - we are lucky enough to also have a BB8 Sphero this year. Students had to use the Tickle Coding App (Warning: Don't have your students search it in the app store) and block code BB8. We taped out a given path on the carpet and students had to work together to program him. Great connection to mathematics, as they had to use angles.
5. Cup Coding - this was an unplugged activity from Code.org. Continues to work on students communicating and collaborating together.
6. Bit Wars - At one of my schools, the class size is much larger, so I added a 6th rotation in using littleBits circuits where students had to create an equipment piece for a Star Wars character. This idea came from the challenge that was given on their website.

Due to winter break and school activities, this project took approximately 4 weeks to complete. Each student was responsible for documenting/reflecting on their experience through questions, fake Tweets, videos and images. Boy, did they love the robotics!

Floors Game Coding
Unplugged Cup Coding


Ollie's Obstacles
BB8 Bowling with Tickle App

For some of my self contained classes, we even tried a bit of Sphero Action Painting! I've always wanted to give it a try and the kids really enjoyed it!


Friday, November 13, 2015

Digital Citizenship Fairy Tales

With 21st century learning, digital citizenship is something our students have to learn. The digital lifestyle will always be with our students and it is definitely our responsibility to work in cooperation with parents to make sure we guide our students down a safe digital footprint.

Last year, my co-teacher and I introduced digital citizenship by having students work on a super hero comic book project. Making a super hero that may resemble them self and then building their comic based on a digital situation that students may face.

Well, our students are now 1:1, which makes it even more important to review safe cyber learning, but it also gives us more creativity to design projects with skills that the students can utilize back in their classroom. In the previous year during PARCC testing, my co-teacher had her students complete a digital story using a green screen and puppets. We thought this would be an interesting route to go having the students take classic fairy tales, but put a modern day twist on the story by involving a cyber safety element. The students loved this project!

With only seeing students 50 minutes, once a week, here is how we introduced it to classes:
*Prior to project introduction, students had a review on digital safety in class.
Week 1: We began class with a video, getting students hooked into the idea. From there, students made their own groups of 4 or 5 (I definitely wouldn't recommend more than 4), and used Edmodo to review classic fairy tale stories that they may or may not be familiar with.
Week 2: Students were given a fictional story organizer, they worked in groups to complete their organizer on Notability or in Google Drawings. They then submitted their document through Edmodo for review and approval.
Week 3: Once their story was approved, students began collaborating on their script in Google Docs. Half of the group worked on the script while the other half began searching for images online to use for their puppets and background scenes. This is a great moment to introduce a mini lesson on image usage rights.
Week 4: Students continued working on their script/images. They were also provided materials that they could test their characters and scenes out with. Each group was given a: Green Screen (made of a display board and green paper), a white note card (for light testing), green straws to attach their characters to and a microphone. We had some old microphones in our lab that fit nicely into the iPads. My co-teacher thought of this as a way to help reduce noise in our small space since we were confined to all working in one room.
Week 5: Students began recording, we used the Veescope Live Free app on the iPads for our green screen.
Week 6: Students used iMovie to edit their film. They added tittle slides, background music, sound effects and credits. Great mini lesson on reviewing how to site sources!

Check our some pictures from our project experience!

Students planning their digital fairy tale
Green Screen recording


Thursday, April 30, 2015

No computer lab? STEAM to the rescue!

As we all know, sometimes PARCC testing can cause a mixup to our weekly routine schedules. In my case, that meant losing my computer lab due to it having to be used by classes for PARCC. Boy, I can't wait until my buildings are fully 1:1 next year!

While I may have been disappointed to lose my lab at first, it was one of the best things that could have happened for my classes! Not only was I able to push into their learning environment, which I rarely have time to visit with my schedule, but I was able to dive into more STEAM based activities as I became the traveling technology teacher for 3 weeks.

So what did I exactly have up my sleeves? 4 weeks of fun that not only challenged students, but focused on team work and reflection!

I began by introducing the challenges to the students with an iMovie. My video reviewed the meaning of STEAM, but then had short videos announcing the resources we would be using during this time. This really sparked their interest and their level of excitement began to rise.

Students were broken into groups of 5. I allowed them to pick their groups because I've always been a firm believer that the choice helps students stay motivated. Since we were without digital devices during these few weeks, I printed reflection packets that were handed out to each group. Yes, I know....I PRINTED! I felt out of my comfort zone standing at the copy machine prepping for this lesson when I try really hard to remain paperless.

Getting back to the excitement.....the students were to complete rotations between 4 different STEAM based activities.

1. Architecture Challenge - non-digital hands on problem solving (this one rotated weekly)
2. Big Sphero 6 - students learned how to navigate and build obstacles for our new Spheros.
3. Makey Makey - students shared 2 Makey Makey kits to connect and create.
4. littleBits - using electronic circuits to accomplish a variety of challenges

Not only were students rotating activities each week, but they were also rotating leadership positions within their group. One thing I've noticed throughout the year, was that teamwork was something that needed a focus, encouraging more collaboration and sharing of ideas.

Each group received a labeled envelope with an activity direction sheet enclosed. For the most part, there weren't too many directions to the activities, more so starters to push each group to explore without requiring a teacher to walk them through.

Overall, I'm glad I took the time to plan all of this out. My students and faculty enjoyed the change in instruction. This also opened the door for students being aware of the resources we have for them to explore further during our Innovation Lab (20% time).


Tuesday, April 14, 2015

Introduction to SketchUp

In my previous posts documenting the journey of our 3D printing education, I discussed the methods I used for discovering and providing some background knowledge to students on our printer.

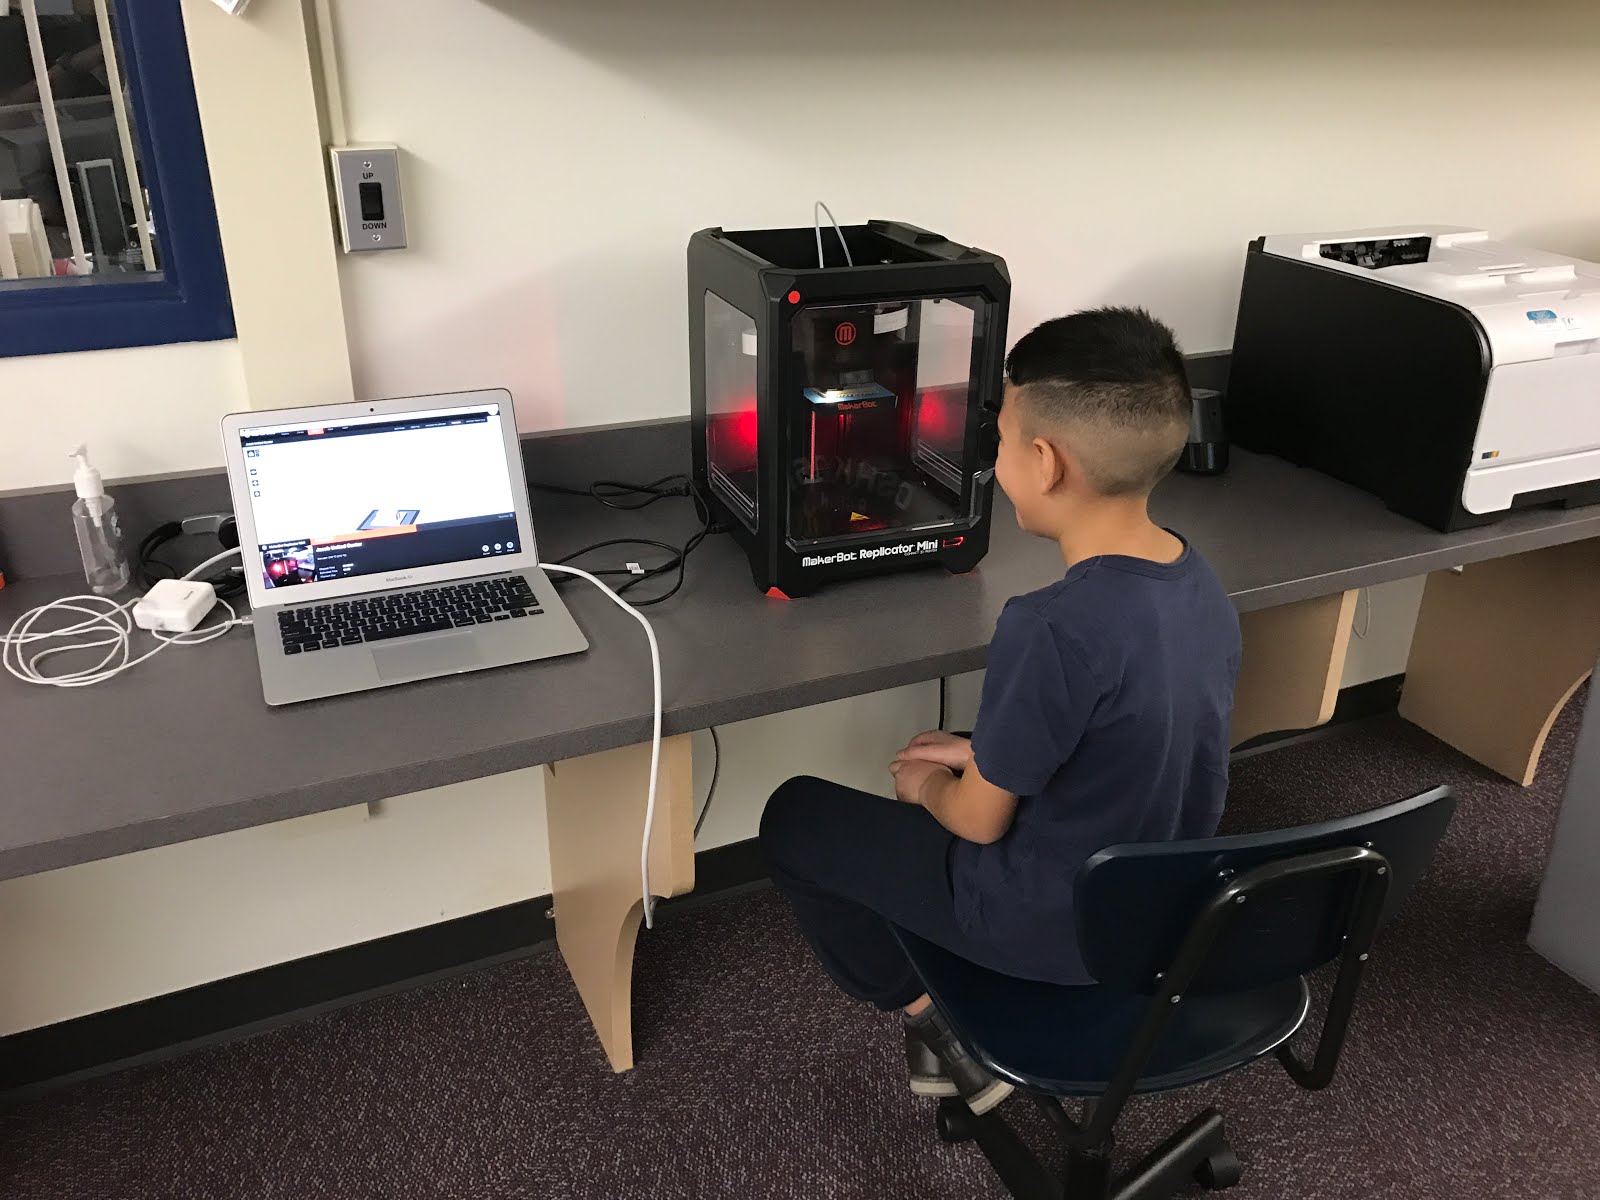
My 4th graders were incredibly excited to begin learning the 3D design software on our desktop computers. After completing a lot of research, and talking to our district office, I narrowed it down between Tinkercad and SketchUP. I've been familiar with SketchUP from previous projects when I used the software for my students to complete a math project a few years back, and ultimately that was the software we agreed upon to use with our intermediate students for our Makerbot Replicator Mini.

When it came down to introducing the software to my 4th graders, I knew one of the most important things I needed to do was give my students time to PLAY! Before introducing my students to the first couple of tools, I just gave them 15 minutes to explore. Not only does this get some of the curiosity out of their system, but we know that this generation of students learn best by exploring. Once their exploration time was completed. I gave them their first challenge, which consisted of creating some basic geometric 3D shapes. You can grab your own copy, HERE.

The following week, I introduced another challenge in class. Most of my students had even returned announcing how they downloaded the education software at home with their family! For week 5's lesson, my students had more creativity to create, but they had to incorporate more tools and demonstrate what they had learned from the first 3D challenge. I was blown away by what my students were creating. They definitely exceeded my expectations! This made me extremely excited for their 3D project that would be introduced after spring break. Grab your free copy of my 2nd challenge, HERE.


Happy designing!


Thursday, March 19, 2015

History of 3D printing, Week 3

Highly possible scenario:

Student: "Mom, Dad, we just got a 3D printer at school!" 

Parent: "That's great, but how is this going to help you in school?"

Student: "Well, let me share with you some ways it can be used."

As I mentioned in previous posts, I wanted to refrain from having the 3D printer treated just as another "toy" in the classroom. Or, for others to look at it as a "waste of money." As adults, whether it be parent or teacher, we learn from our students. They are our next generation of course! What is technologically mind blowing to them now, I can only imagine what resources will be like when they leave college and begin their future careers.

Following the questions that remained from our digital KWL chart in week 2, I thought it would be fun to research the history and industrial background information in the form of a scavenger hunt.

At the beginning of class, we began with a video from Make. My students have been very curious about the filament inside of the printer, so even though they may not have quite understood all the printing terminology, they still had the visual process of how the plastic is made.

We then followed the filament discussion with some videos of our 3D printer and the samples I had made, giving the students an up close visual of how the printing gets completed in layers. How because it is hard for everyone to see the printer in action at once. I decided to use my camera on the iPad to airplay the live feed to our Apple TV. The students were able to work on their next activity while also viewing the printing process.

Going paperless again, I created our scavenger hunt template in Google, that was then shared with the class so they could make a copy. Working in teams, the students completed the scavenger hunt in preparation for a final whole class discussion. I provided links and infographics for my students to search through because of time constraints, but this could easily be a lesson linked into "how-to" research lessons.

We had a final discussion at the end of class to review the information and the interesting facts that they had found.

Now the questions I still have yet to make a decision on...
1. Do I plan a group project or make the 3D design project individual?
2. Do I focus the project around the idea of a "need" in society or an invention?
3. Do I focus the lesson around learning the 3D design software instead?

I worry about this because I know how interested the students are in having a 3D model of their own, but being stretched between 2 schools, I stress the time it would take to get the designs printed in time for the end of the school year.


Monday, March 2, 2015

Elementary 3D Printing Intro Week 2

Now that the gossip has started about the 3D printer in our building, one of the first questions my students had of course was....are we going to be able to print anything?

They are definitely not afraid of the 3D printer and I love that they are so curious! Before we begin to start designing 3D files, I stressed to the students that it was extremely important for them to learn about how this educational tool works, the history behind it and the purpose for industries having one.

For week 2 of our introduction, I figured I would use the traditional KWL chart, as an informal assessment to observe the information they retained from the following week, but also to see what questions they still had to guide me for week 3.

Being in the technology lab, I try to remain as paperless as possible. So I used this as an opportunity to continue to build their Google collaboration skills by having students complete the KWL with a partner in Google Docs. Following their completion of the K and W portion, I then projected a Brainpop video on 3D printing from their educator site. After viewing the video, students then continued to add to the L portion of their document prior to our class discussion.

Most questions that students still had unanswered were:
  • Who invented the 3D printer?
  • How does the filament get molded?
  • How much heat is needed to melt the filament?
  • Can you print in multiple colors? 
  • Does a 3D printer automatically fill in the hollow spaces to make the object a solid? 

This would lead us into a lesson for week 3! 

Printed example how 3D printing can be used in the Jewelry Industry. 
Twisted bracelet from Thingiverse.


Saturday, February 28, 2015

#ICE15 Recap

I don't know about you, but after attending conferences for more than a day I get..
1. extremely excited to try new things
2. completely exhausted from late nights and packing my brain
3. Already thinking about how I can improve my presentations for next year

This year, I was extremely lucky to attend our Illinois Computing Educators (ICE) conference not one, but three days! Next to being surprised and attending ISTE in 2014 for multiple days, this comes in 2nd with my longest consecutive conference attended. I can tell you one thing, I will definitely be looking into hotels for next year. Even being local, with not a huge commute, it still adds into the exhaustion with traffic.

There were many great topics that I absorbed and many great people I was able to catch up with and meet.  One of the workshops I liked the most was "Coaching Teachers to Student Success," by @avrarobinson. If you haven't heard from her yet, find her on Twitter. Her coaching resources are amazing and the personalities she created for first timer technology integrated teachers are spot on. Lots of handy tips to help along the way when working to build a partnership with educators.

The maker movement is still going strong. There were many hands on activities and sessions to learn about coding, robotics and engineering. I'm sure this is something that won't fade out anytime soon. Passion based learning is truly important and I wish I had that opportunity in school.  Sylvia Martinez was a keynote speaker and a true inspiration. I also very much enjoyed Jim Sill, who gave a very thought provoking keynote using his past experience in film.

Another area I personally reflected on was my break-out session, of course. Now, I'm normally used to presenting in smaller classroom setups, where maybe 10-15 people attend and it is an easy walk-through in 45 minutes for my augmented reality topic. Well...I definitely wasn't expecting to be presenting in a comedy club, with a room full of educators! While I experienced some technology bumps from this first time larger experience...here are some tips I can offer and suggestions I plan to follow myself.

1. Have a backup plan: the wireless connection wasn't allowing for my reflector app to work from iPad to laptop. Either purchase VGA connects to have on hand or check with your district if there is one you can barrow. Luckily I had one for each device.

2. Stick to your backup plan: While my reflector didn't work, I had planned on using my VGA connector for the iPad. Well, the nerves got the best of me and I presented from my computer the entire time. I definitely regret that.

3. Keep your audience in mind: Speaking to a larger group was quite the surprise. What was a very successful PD that I had practiced in advanced at local education camps, would need to be simplified for a larger group. I had so many materials with me that I didn't even use and felt like I was going too fast.

4. Be proud of your accomplishment: While things may have not gone perfectly, still take pride in what you have done, especially if it was your first time hosting a session of this scale. Reflect on your experience and try again. We always tell our students to learn from their mistakes, so why not follow the same advice?

Thanks to those who attended my workshop and shared your experience on Twitter! Also, a big thank you to my district team, both past and present for supporting me!


Friday, February 20, 2015

It's as easy as 1, 2, 3-D! Week 1

Some of the schools in my district were surprised with a new addition to our labs...

Have you guessed what it is yet? We have a 3D printer! Under the cloth is a very lovely, MakerBot Replicator Mini!

Immediately, the gears in my brain began turning to develop a plan for integration into my technology class. I was constantly pondering what grade level I would use it with and where would I even begin, but I finally decided to introduce this to my 4th grade students first since my 5th grade groups would be starting innovation lab first.


I began researching and came across some links posted to Kathy Schrock's Guide to Everything. Kathy has listed tons of resources that can definitely get someone started in the right direction. However, one of the challenges I began to face was that no matter where I searched, mostly all of lessons or project ideas that I would stumble upon were for jr. high students or higher, not for elementary. So in order to organize my ideas better, I began pulling ideas and resources that I found into a document. Now, I'm definitely a lesson plan as you go individual, just because I will constantly think of new ideas in the car, on a run or I will stumble upon something on social media. Although, one of my main reasons that I don't lesson plan far in advance is because my students are constantly surprising me with their knowledge on topics or willingness to go look information up between classes so they can be prepared.

So, after gathering my resources and knowing this tool was probably new to most. I decided to begin my introduction to 4th grade with a mystery "what's our fragile futuristic tool?" activity. Once the tool was guessed, we began drawing what we thought a 3D printer looked like. That lead into a big discussion until it was finally unveiled and followed by a fun Kahoot survey to see what students may have known.

This activity took up our entire technology time and definitely left the students excited to come back and learn more!  


Thursday, January 29, 2015

EdTech Baton

Have you heard of or held the EdTech Baton yet? Not quite sure what it is? Hopefully, you will be the next one to carry it!

EdTech Baton is an Instagram community for you guessed it, Ed Tech! Similar to a relay race, each day a new teacher gets the honor of holding the virtual baton and sharing their innovative stories with all to read. You can sign up HERE!

A former colleague of mine told me about this experience and I knew I had to quickly jump on. It is a great way to share the amazing tech integration in your classroom, but to also gather ideas that you can utilize.

Here is a breakdown of how it works.
1. Signup with the link above and you will hear back from EdTech Baton to confirm your date.
2. Closer to your scheduled date, EdTech Baton will continue to check-in with you, make sure you don't have any questions to make sure you feel as comfortable as possible.
3. The week of your virtual baton you will receive another email with the login information for their Instagram account. It is definitely a good idea the evening before you hold the baton to make sure it works by logging in.
4. The day of, it is time to run with that baton and share. Post anywhere from 6-8 photos, but make sure to use the rules and policies as a guide.

What better way to gain EdTech Friends, resources and get motivated from ideas! Best part, you can even sign up again in 90 days to continue sharing!

EdTech Baton's website has a ton of information to guide you and answer any questions you still have. It is definitely something work checking out! Check out the images below from our technology lab virtual baton day!


Saturday, January 10, 2015

Syntax Coding

After two weeks of block coding and two weeks off for winter break, I figured my next logical step would be to introduce my students to syntax coding. Some have mentioned that they have dabbled a bit with script, but many were unfamiliar by it....including myself. The most knowledge I've had with script was mostly working html, just like most bloggers, to fancy up my site.

My winter break was spent searching, trying to find just the right programs that I knew my students would enjoy. I also referred back to many of my notes from a local chapter of our Illinois Computing for Educators, DeICE. This was a mini conference that I attended one Saturday for local PD. I happened to attend a class by Tara Linney, you can follow her on Twitter @TechTeacherT. The one part I loved about her session was that she didn't only give various activities for different types of coding, but she also visually presented how coding is aligned to the Common Core!

So, what did I end up deciding on? Drum roll please....

My programming language of choice: Java Script (I knew it would be something students had heard of)

4th Grade Activity: Students would be introduced to Java Script using Code Combat. Students can save their progress through their Google Accounts, I also like that it is game based and fairly easy to pick up on. The students can type the script out, or it gives the students the option to click on their code. This was great for students that were uneasy about scripting! Overall, it gives them the connection between programming and commanding something to move. It also allows students to get familiar with how the lines of code are generated.

5th Grade Activity: Once again, I selected Java Script as my language of choice, but I used Code Avengers to introduce scripting to the students. I knew this would be a bit more challenging compared to Code Combat, but that the students would be hooked because in the end result, they create a game that they can share with other students on Edmodo.

How did I start my introduction to syntax? With a Google Slide Presentation again of course! Simply to generate some background knowledge and make some connections to the Hour of Code that we participated with before. The one thing I wish that was available, was a great video to introduce syntax coding specifically. There are so many great sites for block coding, but I wish there was more of a focus on script.

Overall, the students loved the lesson! I was actually surprised by this because I thought they would have favored the activities of block more. I'm so proud of them all for trying and some of them even teaching me a few new things! :)


Friday, December 19, 2014

Hour of Code

It has been awhile since I have blogged, but now starting to get back into the transition of things after embarking on a new position and purchasing a new home! Many first this year for the family to keep us busy.

Last week we participated with the Hour of Code, presented by Code.org. I'm sure many of you know about the event by now, but for those that don't....it is a week long celebration to raise awareness about computer programming to students. To try and get them more involved and to hopefully gain some sort of interest in one area of programming.

My students have very much loved it in the past, and once again it was a favorite again this year. So much a favorite that we had to code not only one week, but two. Keeping in mind, I only see my students once a week for 50 minutes.

We began our coding session with a video. A very popular one from Code.or called, "What Most Schools Don't Teach." It is a great 5 minute video that really gives a lot of visuals on other areas of computer programming.


After watching the video, we began with a short Google Slide presentation to walk students through different types of coding and some of the vocabulary they would stumble across.

Because of our time being so little with the students and everyone having a different taste, my teaching partner and I came up with the idea of creating a coding menu. This would allow students to pick activities from different various levels and different types of coding. That way, they can participate with the Hour of Code doing something that would appeal to them. Click the image below for a FREE copy. Images are taken from Code.org, Tynker and Made With Code.

Menu created by K.McFarlin and M. Thorne
The students really loved the idea of spending two weeks on coding, which allowed them to experience more than one activity in the short time that we have them.

Top two favorite coding activities by students:
1. Flappy Bird (They loved being able to share their game on Edmodo with other students at our school)
2. Made with Code by Google (Both boys and girls loved the animation and design programming activities)

After winter break, we will be diving into Syntax coding. They are very excited for that!


Wednesday, September 3, 2014

A New Transition

For the last 4 years, I've had the great opportunity of teaching in a 1:1 Apple Distinguished District. After years of collaborating with others and leadership opportunities, it was a decision that I made to transition myself into a new role with a new district.

When I heard about my current district beginning their 1:1 journey, it was quickly something I took interest and investigated for how to become part of it.

After the interview process, I was offered the position as a technology teacher within the district for two elementary buildings. While I'd be using my 1:1 skills that I had gained previously, there were a couple of differences.

1. I'd become a specials teacher. (Yes, I now understand the hardships of trying to memorize over 600 names!)

2. I work in a lab with PC computers (Very different from my years of 1:1 iPads and Macbooks)

3. Skills - the students are still learning and I have to constantly remind myself of that. They don't have the experience that my previous students had.

With knowing those differences, I've used it as a way to learn more myself. It really helps me to think more about the lessons that I create. Not to mention, I'm working on patience with a new device and 600 new students. Of course, they love teaching me things about the PC that I have forgotten over the years being a Macbook user.

Overall, I love the change I have made and wouldn't change it one bit. I love being able to work with many students and faculty members, rather than being kept to one classroom. However, I couldn't be in the position I am today without the encouragement and opportunities given to me by my previous faculty, staff and students.


Tuesday, July 22, 2014

Living, Laughing and Learning!


Living, laughing and learning I believe is something that summarizes the last week that I haven't been able to blog for. It has been pretty chaotic, but well worth it and hoping I can catch up now. I don't want to give up on Michelle's Big Time Blogging Challenge from Big Time Literacy! So, start blogging and link up with us!

Photobucket
So I'll start from where I left off last and twist some of the topics from there!

7/16 - Favorite TV Shows or Movies
-Recently, one of my favorite TV shows has been "Halt and Catch Fire." If you haven't seen it, and you like computers and technology, I highly suggest watching it. It is a TV series based in the 80's around the design of the first portable computer. This show brings flashbacks to when my dad tried to surprise me with a laptop computer in the 90s. He got it on a deal, but I wanted nothing to do with it because it was so bulky, it even had a charging station as opposed to a power cable. Now, being the technology lover that I am, I regret not holding onto it just as an antique.

http://images.amcnetworks.com/blogs.amctv.com/wp-content/uploads/2014/05/hacf-key-art-325.jpg
AMC TV
 7/17 - Favorite Classroom Management Tip
-One of my favorite classroom management tools is Class Dojo. For those that aren't familiar with the website, each student has an avatar that can be customized. Students can earn points for making positive decisions in the classroom or even have them taken away. It is even setup now where you can weight different rewards so the value of the point increases. I love this website because it is incredibly useful in a 1:1 room. My students can check their points from their own device when I don't have the whole class displayed on the screen. One of the best parts, I don't have to be stationed at my computer to award points, it can even be done from my iPad or iPhone. I also love the parent messaging feature that has been recently added since parents can join and view their student's stats.

http://www.santeesd.net/cms/lib/CA01000468/Centricity/Domain/278/class%20dojo%202.jpg
7/18 - Teacher "Must Haves" that you purchase at the start of the year:
- Most teachers are out hitting the penny sales, which I admit I also do at the start of the year, but I think that is more to stock up for the items I know my students won't bring in. However, I think my must haves tend to be more along the DIY route. Every year, I try to make my classroom feel more like a relaxed home environment. So, sometimes my must haves are projects I have made at home for decorations....like curtains, cushions or stools. Other times, my must haves are stocking up on items that fit my classroom color scheme like contact paper to makeover file cabinets and shelves or plastic table clothes to brighten up my bulletin boards. I spend so much time decorating my classroom because even I want to feel comfortable in there for as much time as I spend in it during the day.

7/19 - What holiday do you enjoy spending most with your students?
- I think over the years, I have become less focused on holiday celebrations. Some of the reason is because I have had students that just didn't celebrate, but the other part of the reason is because I've had students that just were interested in the typical classroom party. Rather, what I have found myself getting more excited about is the reenacting historical events to bring them to life. After having seen Dave Burgess, "Teach Like A Pirate," speak at our local ICE conference, this really started the fire under me. I've never laughed so hard in class compared to the times this previous year when we acted out the taxation from the Brits on the Colonies and when we learned about Henry Box Brown. We really had a lot of fun and I know the days were memorable for the kids.
http://www.writerscafe.org/uploads/stories/40afcc0588d9d13c79702b56c184f3af.jpg

7/20 - If money were no object, what experience would you give your students?
-If I had the chance, I think my experience would just be to continue to give my students local experiences they wouldn't otherwise have the chance to do. Since most of them only travel between our city and their home country, for the most part they haven't even been to downtown Chicago, until recently. Having moved up with my students from 4th to 5th, I was able to have two great experiences with them. Their first time on a trolley through downtown and a boat tour from the Chicago River onto Lake Michigan. The way their eyes beamed from being on the boat tour was priceless and a day I will never forget. There is so much out there for them to experience locally, so that is what I would continue to do.

7/21 - How do you prefer to read books?
-While I do love my technology, my preference when reading is the good traditional paper book. I know the iPad and/or kindle can do great things for annotating, highlighting, brightness and size adjustments, but there is something about turning the paper pages that I still enjoy. Don't get me wrong, I still do my share of reading electronically, but I do prefer visiting the library or the excitement of waiting for a new book to come in the mail.

In the classroom though, I do really enjoy the availability of electronic books for my students. With our school library being smaller and students having read most of the books over the past few years, I like that they can still connect to the public library when sometimes their family can't take them there. The important thing is just to continue to read, no matter if it is paper to electronic viewing.

7/22 - Living, laughing and learning!
- I figured I would end my catch up on posts with the title of my blog...living, laughing and learning.

Living - This past week, as mentioned, has been extremely chaotic. One important thing I have learned this past year is to take care of myself. I have a very hard work ethic, I probably work too much. I've really tried this summer to relax, get the rest I need, take care of my health, and make good choices that will help my well-being.

Laughing - They always say that the best medicine is to laugh, and I did just that this past weekend. For the first time, we had a family reunion to travel to. Most of the time we only ever really saw one another was when we had weddings or funerals. As the generations get older, it is important to them to make sure we still keep the connections. So, every 2 years we will be traveling for family reunions. The last time I saw some of my cousins, I was around 18 years old.  It was great to introduce them to my husband and my daughter, but also to see my daughter interact with her cousins that she had never met previously. There are also many educators in my family, so the stories there are endless. Overall, it was a great time traveling to Michigan. Just wish I had the time to stop at more sites along the way.

Learning - This is something that we all do on a daily basis. Each day is a learning experience, no matter how your life is structured. Maybe it is a mistake you have made that needs to be corrected, a toddler you are trying to teach something to, or just even trying to educate yourself for preparation. As stress begins to add on before the next school year, I always like to remind myself that tomorrow is a new day. This is what keeps me strong and gets me through the tough times.